Bridge making and fitting for a bass viol
As part of the setup of the bass viol I’ve been cutting and fitting a bridge.
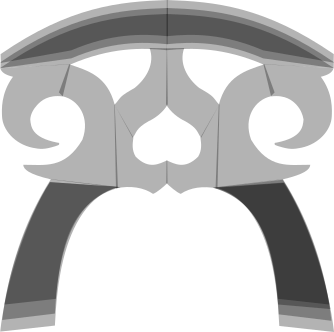
I am using the design from William Monical’s book Shapes of the Baroque. I scanned the design into the computer and then created a set of shapes that correctly followed the outline of the scan but with lovely clean bezier curves.
 The CAD version of the monical bridge with extra feet length and extra height on top.
There are multiple shapes that happened to work. I haven’t merged them into one because the CNC software does that at the time of organising a cut.
I have used this to CNC cut a bridge, but I’ve also handcut one based on using the CNC bridge as a template.
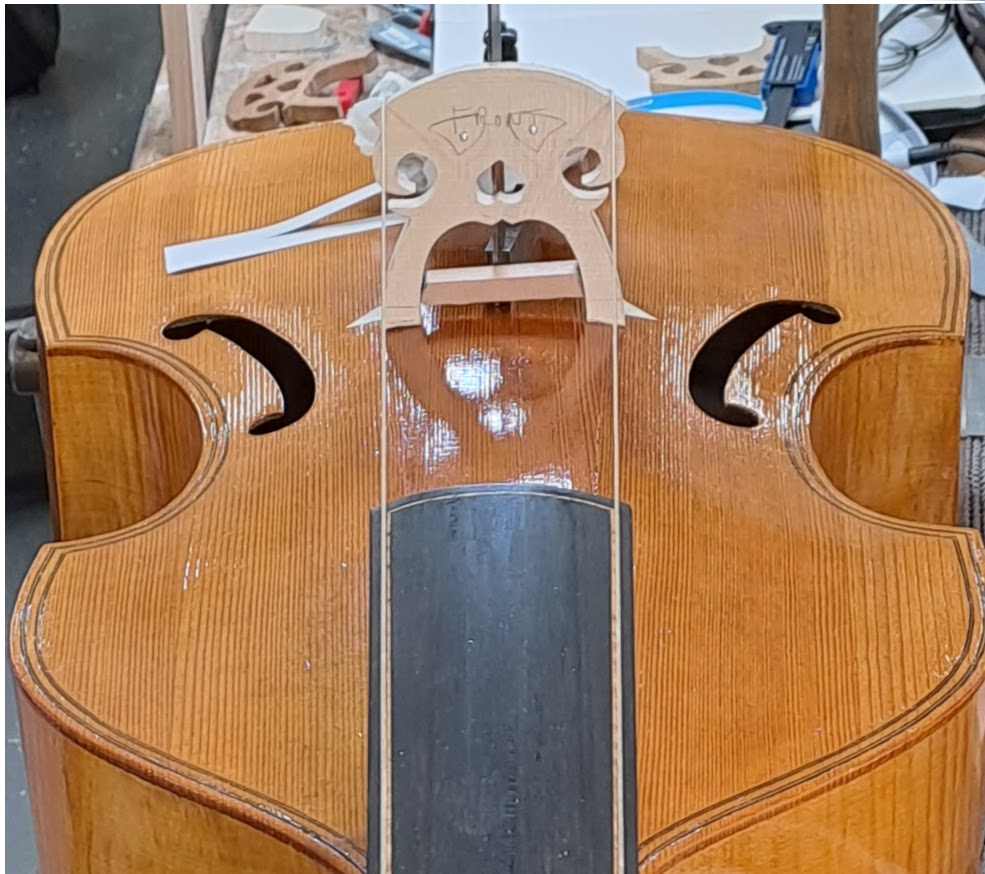
Before fitting the bridge feet, make sure the bridge position is perfect. The following picture shows using two strings to check this.
 Checking the bridge position
You can see the bridge is correctly set from bass to treble (across the viol) by checking its alignment with the fingerboard. You can also measure along each string and check the string length is the same on both sides and correct overall. I’ve then marked the bridge position with two masking tape markers.
A few things worth noting:
- Firstly, we want a nice piece of wood for the bridge with the grain going across the bridge.
- Secondly, the medullary rays should be as close to vertical as possible, ideally parallel with both the front and back of the bridge. This is hard because the back is vertical but the front slopes up from the feet (thicker) to the top where the strings are (thinner). Some compromise is required.
- Leave extra length on the feet becase they will be cut to fit the belly of the instrument.
- Leave extra height above the top of the bridge because this will be cut back to set the string action correctly.
- Finally, it may be a good idea to hold off cutting the holes nearest the strings: how you set the string action will affect the top edge of the bridge and the holes should have a clean and consistent width of wood between them and the top of the bridge. This can only be properly acheived once you have finished setting the bridge height and string height.
I first cut the bridge feet by eye to get them near, and then use some oil paint smeared onto the belly to see where is touching. Gently and carefully cutting away the wood with paint on it from the bridge feet works down until the whole foot is touching. On a new viol, expect to see a corduroy pattern where the grain of the spruce leaves a mark on each foot.