Fitting a baroque neck with a screw
This January I decided to see how much of a violin I could make in three weeks. I already had a “practice scroll” with a baroque length neck. As a folk musician it seemed tempting to make a fiddle rather than a violin.
The inspiration came from David Rattray’s book “Violin Making in Scotland 1750-1950”. This beautiful book shows many violins that continued to have “baroque” style necks until well into the 19th Century. Many of these violins are (or have been) owned by some of my favourite musicians including Tom Anderson and Aly Bain. I think this gives them the right to be called fiddles!
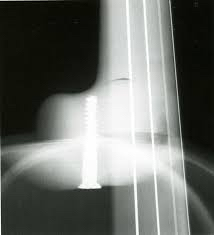
One aspect of these violins is that many of the necks are joined using a butt joint with a screw. Here is an X-Ray from David’s book of a Matthew Hardie Viola of 1799 showing the screw:
This compares to true baroque violins such as Amatis, Strads, Guarneris, etc which are typically nailed on. In the making of this fiddle, I have also used a screw and I think it is worth capturing the process and discussing the pros and cons. While I haven’t made a violin with nails, I have done a bass viol which is a similar process.
The first thing to understand is that the nail - or screw - is there just as much to clamp the joint while gluing as to strengthen the joint. The shallower neck angle, gut strings and button are most likely enough to hold the neck in place if it is well glued, but it is a very hard joint to clamp.
The first step is to prepare the rib structure and carve the scroll.
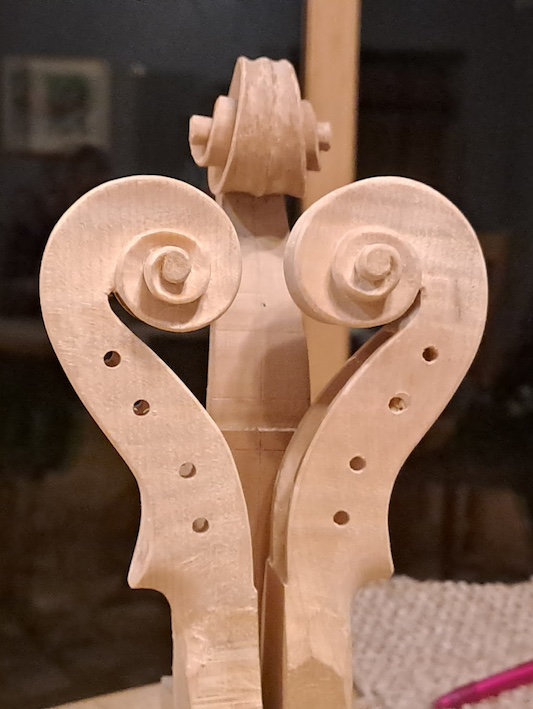
I already had the scroll carved and the rib structure is fairly quick to make.
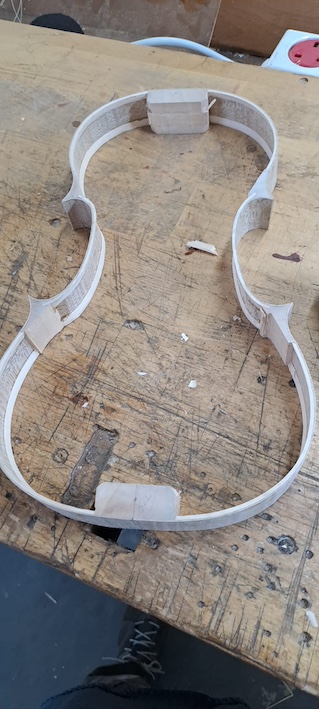 Just remember that the upper rib needs to be a single piece of wood from top corner to top corner for structural integrity.
The next step is to prepare the neck to fit the rib structure. You can do this with the ribs still in the mould but remember to check it again once you’ve removed the mould.
Firstly, check the top of the ribs are clean and don’t bulge out - some careful scraping and use of a straight edge will help. I know some baroque makers shave off the end of the ribs to make a flat joint but that isn’t the approach I took.
Once the ribs are in good shape, have a think about the neck angle. The advice from my tutor - Arnaud Giral - is to make sure that the bottom of the nut is below the level of the ribs. This is fairly easy to check with a long ruler. Mark out the neck length on the front of the neck and mark the curve from the ribs so it meets the neck length in the middle of the ribs.
We are going to be focussing on the area that will butt up against the ribs. I’ll call this the base of the neck.
Bevel the back edge of the neck base so as you carve away material the back doesn’t break out. A knife works great.
The neck can be held in a vice upside down with the fingerboard surface facing you and the neck base surface facing up.
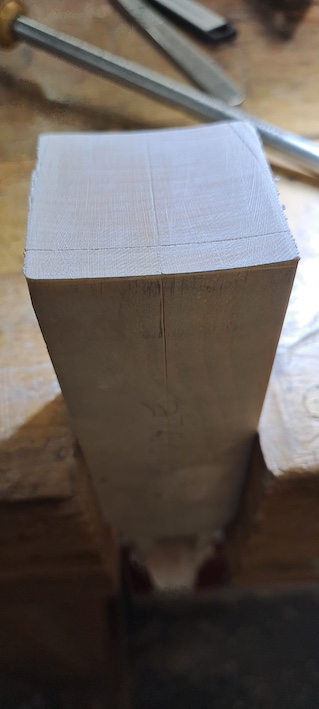 Mark out the neck step and a centre line on the neck base. You can see these in the pictures. In my case, the Scottish fiddles have a neck step of around 2.5mm and the front thickness will be 4mm adding together to make a line at 6.5mm. This gives us an exact spot to place the rib structure when testing the fit and when gluing.
In this picture you can see I’ve already made progress in carving out the neck base. A nice shallow incannel gouge is a great start. Once you get near a crossing file is excellent - but make sure to keep it absolutely perpendicular to the fingerboard surface at all times. One challenge with the crossing file is that it is very easy to get a bump in the middle of the surface if the file slightly tips at the start and finish. A flat scraper used from side to side can very carefully remove these bumps.
A small straight edge is really useful in checking the base has no bumps or dips from front to back.
Some chalk on the rib structure as you get close can show where the neck base is touching. Make sure the rib structure is the right way around!
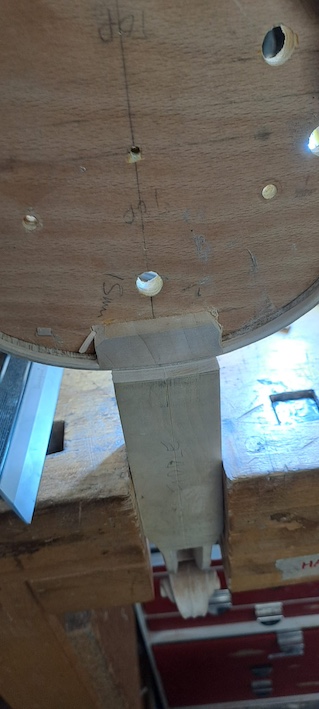
As you get close, keep checking two things: firstly the neck angle - is the base of the nut a few mm below the line extending from the top of the ribs.
Secondly, is the neck straight with the rib structure - put a ruler down the centreline of the fingerboard face of the neck and check where it hits the bottom block.
Once you have a beautiful fit, remove the mould and do any last cleanup of the ribs - for example tidying up the inside where there may be marks from chamfering the lining. While you do this, you can size the neck base thoroughly with thin hide glue. This is needed because it is endgrain and if you glue straight onto it, it will absorb too much glue leaving a weak joint.
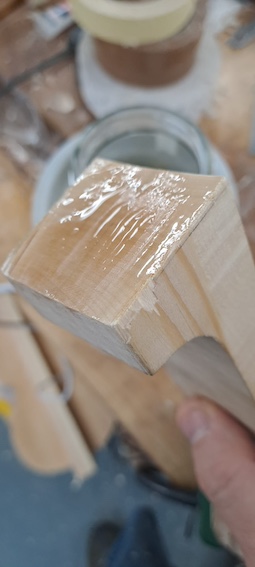
Once the size has thoroughly dried, carefully scrape back with a scraper (from side to side!) and then check the fit again. At this point, calculate the width of the fingerboard at the join and mark this on the top surface of the neck. Calculate the width at the bottom where the button will attach. This is approximately 1mm wider than the width of the button because of the taper and the thickness of the button.
Carefully cut away the sides to create the neck taper.
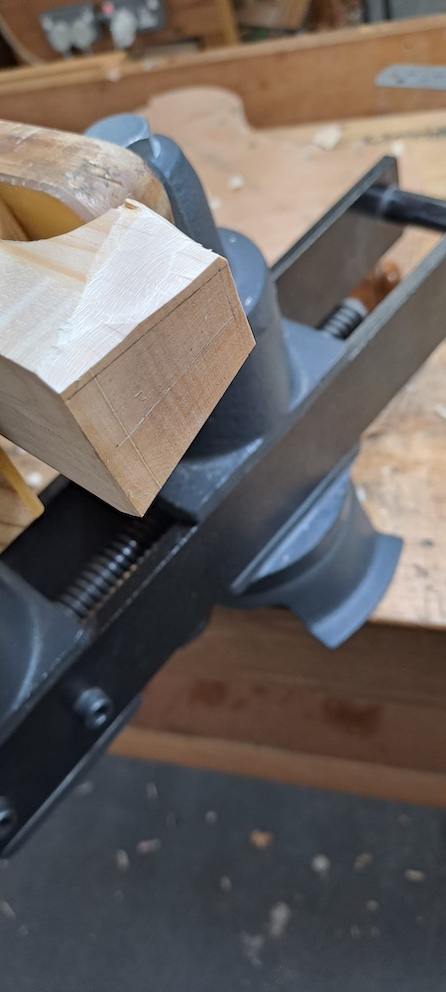
In the picture you can see the marking out. You can just cut away enough so that the final carving doesn’t need to touch the join between the neck and the ribs.
Check the fit once more!
Now for the screw. You can see in the picture above that the screw Matthew Hardie used was cut off at the end. This may have been to get the right length, but I have a suspicion that this also meant that there was a good grip along the whole length of the screw.
Have a good think about the geometry of the neck and how long the screw should be. My neck block and ribs added up to 15mm and I calculated I could afford another 15mm inside the neck, especially as I placed the screw 2/3 of the way up the neck block.
I carefully drilled a pilot hole through the neck block and then placed the rib structure on top of the neck and marked the spot using a nail through the pilot hole. Then I drilled a pilot hole into the neck base starting small and then enlarging it carefully and making sure not to go deeper than the 15mm!
I inherited a box of old 1960s flathead screws from my father (who in turn inherited them from his old landlady - Jean Shaw). These seemed perfect. I also cut off the end of my screw so I used an intact screw with a nice small tip to test out the pilot holes and open up the pilot hole in the neck.
I found the screw really helped test the joint and the fit, but I was super careful not to mess up the pilot holes and to leave enough “bite” left so when I did it properly it really pulled the joint together. I probably spent 30-40m prepping the pilot holes and checking the fit.
Once that is ready, the gluing is super easy and quick. One big difference is that the joint twists as you tighten the screw. I held the glued surfaces together tightly by hand to get some glue stickiness going but the join still twisted a bit and you just have to correct as you go. I ended up with a very very slight tilt that I will take out by replaning the fingerboard surface before gluing the fingerboard (I left a small step so I have 1mm of spare neck to do this.)
I did get a very tight joint with the sides of the ribs.
Here is the final screwed joint.
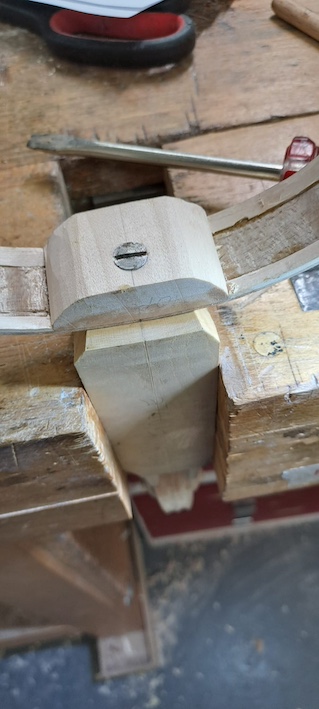
How does it compare to nailing? In terms of getting it ready, both require careful prep and then have a quick glue up time. The twisting is fairly annoying and I think the nails provide a better answer to that (or maybe use more than one screw? Matthew Hardie thought one was enough). The good aspect of the screw is the ability to test it out and also the real “pull-together” that it gave as I twisted it in the final millimetre.
It looks pretty mad I think, but I love the mixture of Scottish ingenuity and fine violin making. It brings to mind the answer to the question “What’s the difference between a violin and a fiddle?”. A violin is culture! A fiddle is agri-culture…
The screw is definitely agricultural!